If you've ever marveled at the golden, crispy, syrup-soaked layers of a Middle Eastern dessert like knafeh or a unique baklava, you've likely encountered Kadayif. This unique ingredient, also known as kataifi or shredded phyllo dough, is the secret behind some of the most beloved and texturally fascinating sweets from the region. Unlike its more famous cousin, the smooth sheet phyllo, kadayif consists of thin, vermicelli-like strands of dough that bake up into a delightfully crunchy and absorbent nest, perfect for holding syrups, nuts, and cheeses. This guide will demystify this versatile dough, exploring its origins, uses, and providing you with the knowledge to create stunning desserts at home, whether you're a seasoned baker or a curious food enthusiast.
The history of kadayif is woven into the rich tapestry of Ottoman cuisine. Its creation is often attributed to the palace kitchens, where pastry chefs sought to innovate beyond standard phyllo. The name itself varies across regions: 'kadayıf' in Turkey, 'kataifi' in Greece, and 'knafeh' often refers to the finished dessert made with the dough in the Levant. This shredded dough became a cornerstone for celebratory sweets, from family gatherings to religious holidays. Its unique texture—simultaneously crispy and tender when prepared correctly—allows it to act as a perfect carrier for the fragrant sugar syrups flavored with rose water, orange blossom, or lemon that are hallmarks of the cuisine. Understanding this background isn't just culinary trivia; it's key to appreciating the craftsmanship behind a package of kataifi pastry and treating it with the respect it deserves in your kitchen.
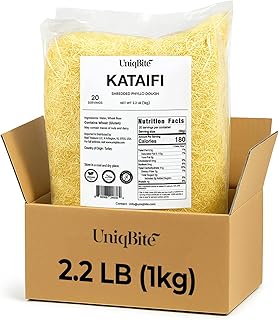
Before you start cooking, it's crucial to understand the product. Authentic shredded phyllo dough is made from a simple mixture of flour, water, and a bit of oil, which is then extruded through fine holes onto a hot griddle, creating the iconic thin strands. It is typically sold dried, which gives it a long shelf life and makes it accessible worldwide. A high-quality product, like the Kataifi Pastry, comes in a 1kg pack, perfect for multiple desserts. When you open the package, you'll find the dough clumped together; the first step is always to gently separate the strands with your fingers to loosen them up. This ensures even buttering and baking. Keep the dough covered with a damp cloth while you work to prevent it from drying out and becoming brittle.
Classic Desserts Made with Kadayif Dough
The most famous application of kadayif is, without a doubt, Knafeh (or Kunafa). This iconic dessert features a layer of the shredded dough, usually buttered and pressed into a pan, filled with a sweet cheese like Nabulsi or Akkawi, and topped with another layer of dough. Baked until golden and then drenched in syrup, it's a sublime combination of salty, sweet, crispy, and gooey. Another staple is Kadayıf Dolması, where the strands are wrapped around a filling of crushed nuts (like walnuts or pistachios), shaped into small rolls or nests, baked, and then syruped. These are essentially the shredded dough version of baklava, offering a different, more textured bite compared to the layered classic.
The Modern Twist: Viral Kadayif Creations
While tradition is paramount, kadayif has found a new lease on life in the age of social media through innovative, often simpler desserts. The most viral trend is the Kadayif Chocolate Bar or Dubai Chocolate Bar. This involves taking a block of good-quality chocolate, encasing it completely in a blanket of buttered kadayif strands, and baking it until the dough is crisp and the chocolate is softly melted inside. The result is a stunning dessert that contrasts a crunchy, golden shell with a rich, molten center, often served with a scoop of ice cream. It's a perfect example of how this ancient ingredient can be adapted for modern, visually impressive, and delicious creations. Using a reliable kataifi pastry is essential for the structure of this dessert.
Step-by-Step: Preparing and Baking with Kadayif
Success with kadayif hinges on a few key techniques. First, buttering is non-negotiable. After loosening the strands, you must thoroughly coat them with melted butter or ghee. This is best done with your hands to ensure every strand gets coated, which promotes even browning and that essential crispy texture. For layered desserts like knafeh, press the buttered dough firmly into your baking dish to create a compact base. Second, watch the bake. Kadayif can go from perfect golden to burnt quickly. Bake in a preheated oven (usually around 350°F/175°C) until it is uniformly golden brown. The third and most critical step is the syrup timing. For most desserts, you should pour the cool or warm syrup over the hot pastry straight out of the oven. This allows the crispy dough to absorb the syrup effectively without becoming soggy. The syrup should be the right consistency—not too thick, not too thin.
Pro Tips for Perfect Results Every Time
To elevate your kataifi dessert from good to exceptional, consider these expert tips. Clarify your butter or use ghee for a richer, nuttier flavor and to prevent burning. Toast your nuts before adding them to fillings; it unlocks their oils and intensifies their taste. When making syrup, add a tablespoon of lemon juice; it prevents crystallization and adds a subtle brightness that balances the sweetness. If your kadayif dessert seems dry after baking and syruping, it may not have absorbed enough syrup; you can gently warm a little extra syrup and drizzle it over individual servings. Finally, always let your finished dessert rest for a few hours, or even overnight, before serving. This allows the flavors to meld and the syrup to fully permeate the dough, resulting in a perfectly moist and flavorful treat.
Storing and Working with Leftover Dough
A 1kg package of shredded fillo dough is generous. If you don't use it all, proper storage is key to maintaining quality. Reseal the original packaging as tightly as possible, removing excess air. Place it inside a second airtight plastic bag or container. Store it in a cool, dry pantry; for longer storage (several months), you can keep it in the freezer. There's no need to thaw frozen kataifi; you can use it directly from the freezer, though you may need a few extra minutes of baking time. Leftover baked kadayif can be stored at room temperature, covered, for 1-2 days. For longer storage, refrigerate it, but be aware the texture will soften. Re-crisp it briefly in a warm oven before serving.
Conclusion: Your Gateway to Authentic Sweets
Kadayif is more than just an ingredient; it's a gateway to centuries of culinary tradition and modern dessert innovation. Its unique shredded form offers a textural experience that sheet phyllo cannot replicate, making it indispensable for authentic knafeh, baklava, and the latest viral chocolate sensations. By starting with a quality product like our featured kataifi pastry, mastering the simple techniques of buttering and syruping, and respecting the balance of flavors, you can confidently bring the wonders of Middle Eastern pastry into your own kitchen. Whether you're crafting a cheese-filled knafeh for a special occasion or impressing guests with a molten chocolate kadayif bar, this versatile dough is your key to creating unforgettable, Middle Eastern dessert magic.


